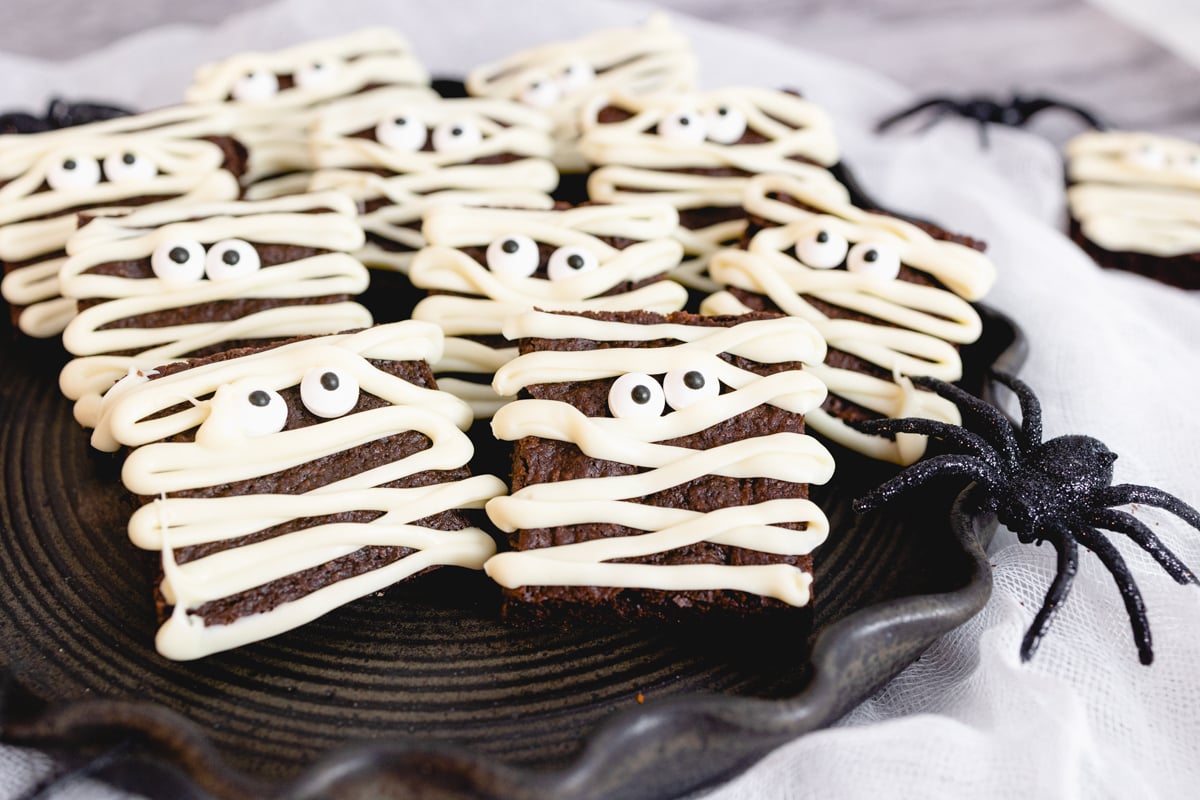
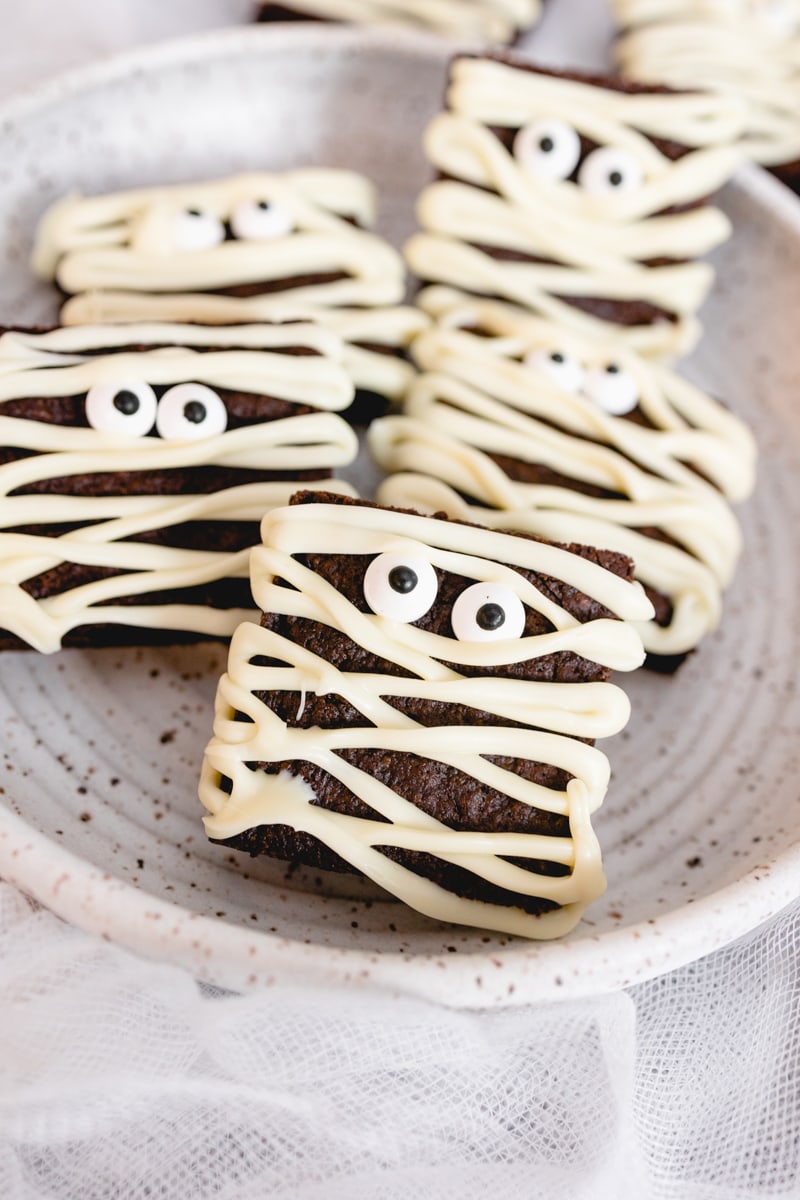
Chocolately goodness right here with these spooky Mummy Brownies. Your little ghosts and goblins will come running to taste these easy brownies and celebrate Halloween and you just might win brownie points with the big kids in your life too. It's always fun to enjoy holiday treats.

This post may contain affiliate links. Thanks for using my links! Disclosure Policy here.
Let's cut to the chase, these brownies might look like mummies but there is nothing old and gross about them. In fact, this is my Best Brownie Recipe dressed up like a mummy for the holiday.
An easy recipe that is hand mixed and I'll show you how I made the mummy wraps out of white chocolate and a zip-lock bag.
Shopping List
You will naturally need Flour, sugars, eggs etc for this recipe. Typical pantry ingredients. You will also need the following:
- White Chocolate Chips OR White Candy Wafers ~ I recommend a high quality white chocolate chip as it melts smooth and is great tasting. A White Candy Wafer will also work well too.
- Semisweet Chocolate Chip ~ High Quality is best for the best tasting brownies you've ever enjoyed
- Candy Eyeballs ~ These can be found in a variety of sizes in the Halloween Section of your store or the Wilton Baking Section. I prefer the middle size candy eye balls

How to make Mummy Brownies
Making brownies is simple, so simple it's a recipe my boys make all on their own. Who doesn't love to make midnight brownies and eat hot out of the oven? We sure do and the memories are priceless.
Gather all the ingredients needed along with a large mixing bowl, a spoon to mix everything together and a 9x9in or 8x8in baking pan.
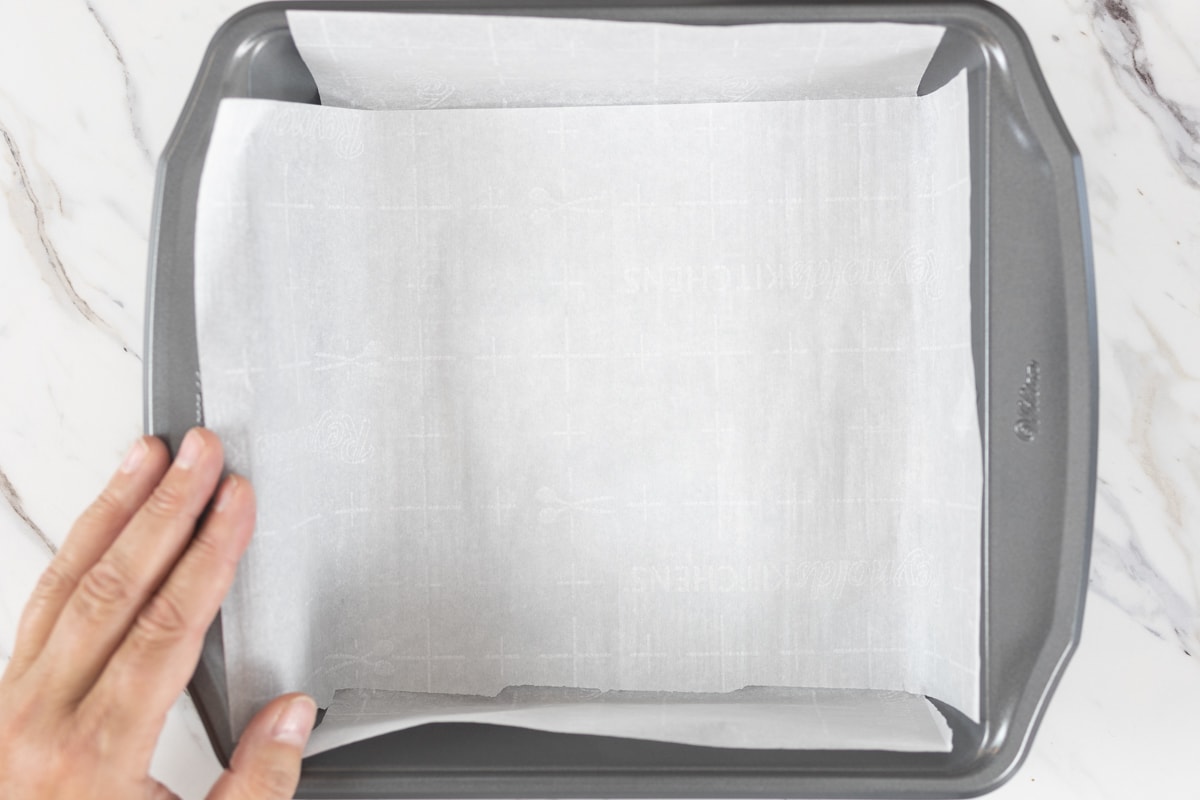
Line baking pan with parchment paper. Does this really help? Well, I think so and you will be able to lift those brownies right out of the pan and cut into beautiful square pieces. I like to use 2 pieces of parchment and line in opposite directions as down.
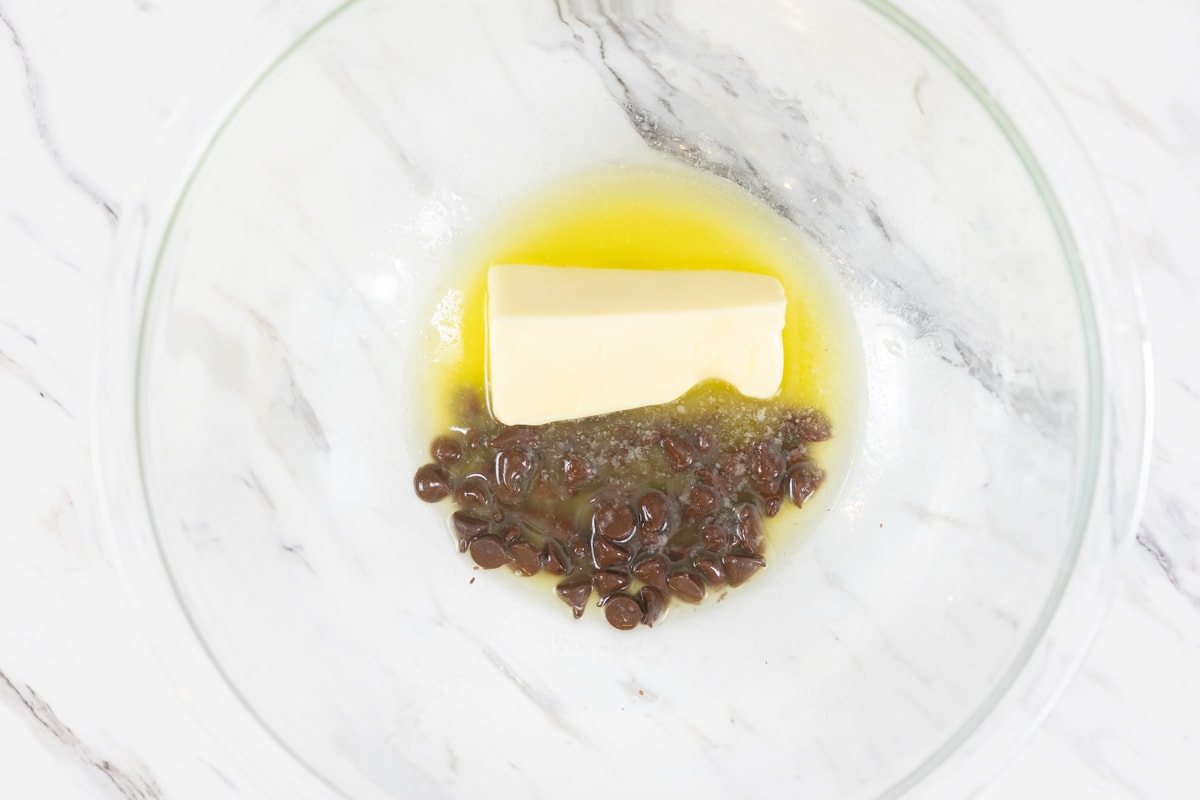
Melt Butter and Semisweet chocolate chips in microwave and stir to combine.
In a mixing bowl add the dry ingredients of flour, sugar, brown sugar, cocoa, baking powder, baking soda, and salt. Mix together to combine and create a well in the center. This is where you will add the wet ingredients.
Add eggs, water, vegetable oil and vanilla into the center well. Break up the eggs and then gradually incorporate the dry ingredients and mix until everything is combined. No need to over mix.
Just make sure you have lifted all the flour mixture from the bottom of the bowl is fine.

Place brownie batter into the bottom of the pan and bake. Make sure to test the brownies using a toothpick. When it comes out clean, it's done. Do not over bake brownies.
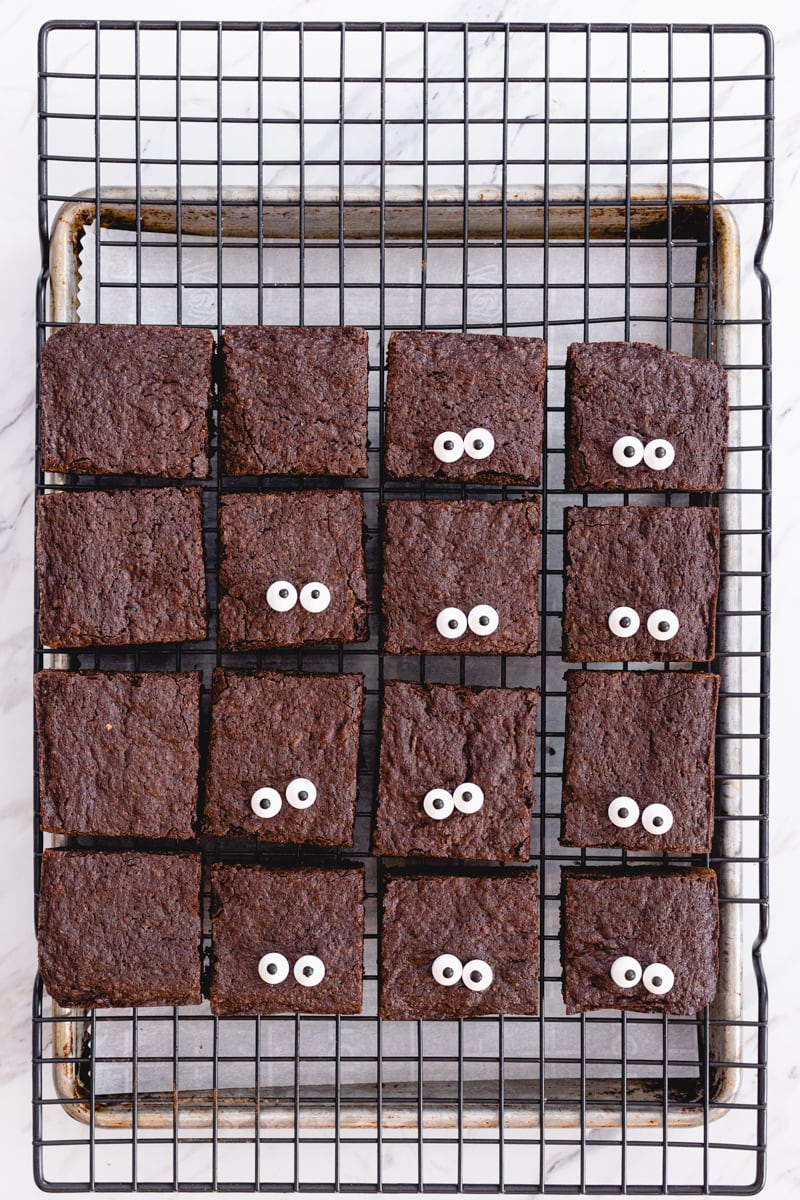
Allow brownies to cool completely. At least 30 minutes but longer if you have the time. Then remove brownies from pan and cut into 16 squares. Thats 4 rows by 4 rows and separate on a cooling rack.
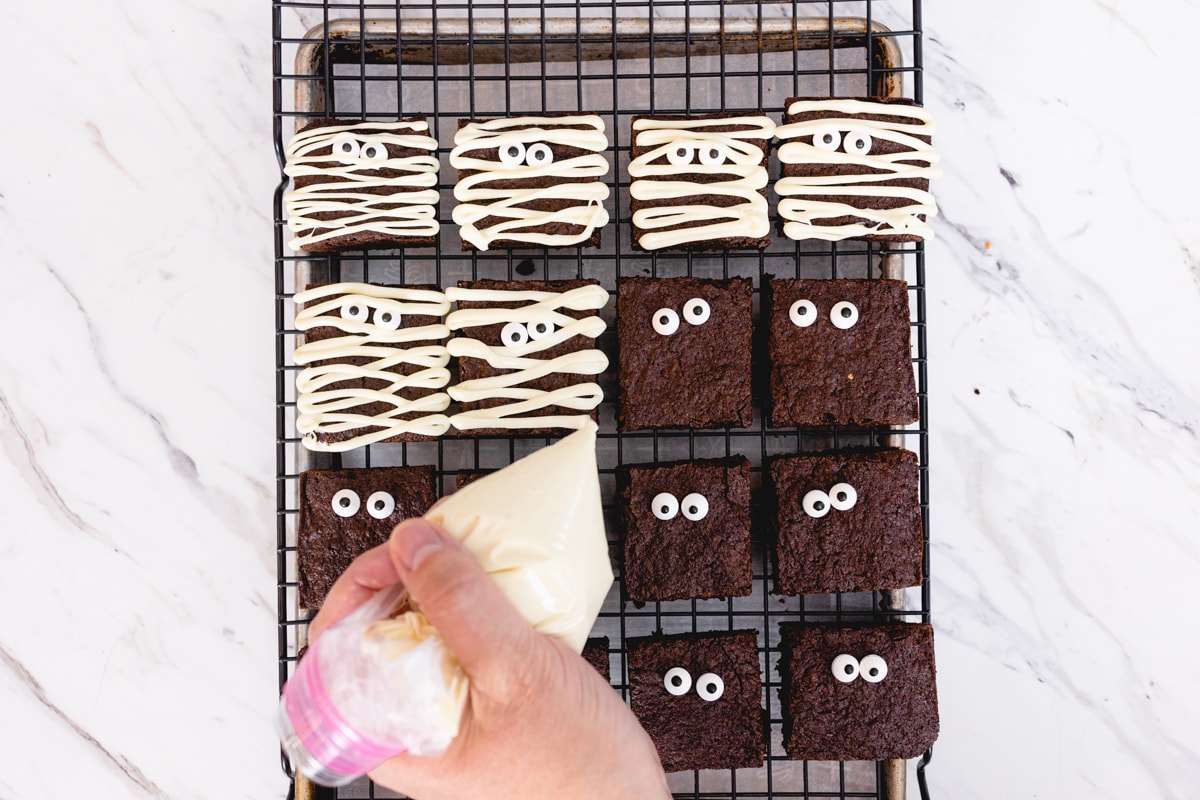
Gently place 2 candy eyeballs on each piece. The trick to getting the eyeballs to stick is with the white chocolate. Don't worry, I'll explain.
Then in a small bowl microwave white chocolate or white candy wafer in microwave for 30 second intervals until melted smooth.
Add melted white chocolate to a sandwich size zip-loc bag and cut a very small snippet on the corner.
Start at the top of the brownie and drizzle a strip of chocolate across the top, as you come back across the brownie, make sure the chocolate also touches the eye ball candies. This will help hold them in place.
Cross back over the brown just under the eyeballs and again, just barely touch the melted chocolate to the candy pieces. It's just that simple.
Once the chocolate hardens the eyeballs will stay in place. Just like magic and with very little fuss on your part.
Allow chocolate to cool until hardened. Depending on the temperature of the room this could take 10-15 minutes. Once chocolate has set, these mummy brownies are ready to share to the neighbors, or enjoy yourself.
How to store Brownies
Brownies are best stored in a sealed container. They will stay fresh longer with kept tightly sealed in a zip-loc bag or container with a lid.
How long will Brownies last
In my home Brownies only last about 1 day. They are eaten and enjoyed way to fast. But typically they will last up to a week when stored properly.
Can I freeze Brownies?
You can! Freeze before or after you add the white chocolate mummy, it does not matter. Freeze up to 3 months.
Creepy Creations
- Black Velvet Layer Cake from Fresh April Flours
- Bloody Monster Hands from That Recipe
- Monster Rice Krispie Treats from Hostess At Heart
- Mummy Brownies from Devour Dinner
- Mummy Halloween Poppers from Magical Ingredients
- Mummy Spinach Artichoke Stromboli from The Spiffy Cookie
- Pumpkin Pudding with Chocolate Spiderwebs from Art of Natural Living
- Spider Web Mexican Pizza from Palatable Pastime
- Spider Web Pretzels from Jen Around the World
- Vampire Donuts from Hezzi-D's Books and Cooks
We share Recipes From Our Dinner Table! Join our group and share your recipes, too! While you're at it, join our Pinterest board, too!
More great halloween recipes for you
- Cinnamon Roll Intestines
- Halloween Brownies
- Caramel Apples
- Halloween Marshmallow
- Candy Corn Poke Cake
- Pretzel Spider Web
- Churro Cupcakes
- Halloween Chex Mix
- Pumpkin Fluff Dip
- Pumpkin Snickerdoodle Cookies
- Candy Bar Cookies
Mummy Brownies
Ingredients
- ½ Cup Butter
- ¼ Cup Chocolate Chips - Semisweet
- 2 teaspoons Vanilla Extract
- 2 eggs - large
- ¾ Cup Flour - 94g
- ½ Cup Sugar - 100g
- ½ Cup Brown Sugar - 100g
- ⅓ Cup Dutch Process Cocoa - 33g
- ¼ teaspoon Salt
Toppings
- 32 Candy Eyes
- 1 cup White Chocolate Chips - or Candy Wafers
Instructions
- In a large mixing bowl melt butter and chocolate chips in microwave for 30 seconds. Stir and melt for 30 seconds more. Stir until butter is fully melted
- In a smaller bowl combine flour, brown sugar, white sugar, cocoa powder and salt. Mix to combine.
- Mix eggs and vanilla to butter and chocolate mixture until thoroughly combined.
- Hand stir dry ingredients into wet ingredients until fully combined.
- Bake in a 9x9in baking pan lined with parchment paper or spray with cooking spray
- Bake at 350F Degrees for 30-35 minutes or until toothpick in center comes out clean
- Allow to cool in pan for 5 mins before lifting brownies out using parchment paper and allow to fully cool for 30 minutes before slicing.
- Slice cooled brownies into 16 pieces. 4 rows by 4 rows and place on cooling rack
- In a small bowl melt white chocolate chips in microwave in 30 second intervals stirring in between until smooth. Do not over cook or chocolate will burn.
- Place melted chocolate into a sandwich zip-loc bag and snip a small piece off the corner to drizzle chocolate
- Place 2 eyeballs on each brownie piece
- Drizzle chocolate starting at the top of the brownie across to the other side and then back making sure to touch chocolate with eyes to help secure in place and continue below eyes making sure to touch chocolate on eyes.
- Repeat the back and forth drizzle down the brownie to create a mummy look.
- Allow chocolate to cool for 10-15 minutes before storing brownies.
Notes
- Milk Chocolate Chips for Semisweet Chocolate Chips
- Baking Cocoa Powder for Dutch Process Cocoa
- Adding an extra egg will result in cake-like brownies
Nutrition Disclaimer
All nutrition values are approximate and calculated by a plugin and are provided as a courtesy. Adding or subtracting ingredients will change the nutritional value.
Brooke
Super adorable in theory but the white chocolate does NOT flow like it should to get the look in the photo. I’d love some advice on getting it to the right consistency!
Devour Dinner
Hi Brooke, Sometimes depending on the brand or type of chocolate used it can be thicker than others when melted. Try adding in some vegetable oil to the chocolate to thin it down. Add 1/2 teaspoon at a time. I also like to use melting chocolate wafers. These tend to melt more smooth for a nice consistency.
Emily
These are too adorable! They are extremely tasty with the mummy icing on top and great for Halloween and kids!
Inger @ Art of Natural Liivng
These are so cute--love the little eyes peering out. And I think even I could do them!
Lynn @ Fresh April Flours
One of my favorite things to do to brownies for Halloween!
Hezzi-D
Such a fun and easy Halloween dessert!
Julie Menghini
We are brownie lovers and this brownie is simply adorable for our little spooks!
Radha
These are decadent and the mummy brownies are a great idea for a Halloween party!